To manage your FASTQ files in ReadStore, follow these two main steps: Upload and Check In.
During upload, ReadStore detects new data and automatically runs a quality check (QC) to verify the file format and integrity, as well as generate key statistics like the number of reads and their quality. Once this QC step is complete, the files appear in the Staging area, where you can group them into datasets for further analysis.
Let’s break this down

1. FASTQ Upload
You will upload FASTQ files using the ReadStore Command Line Interface (CLI).
First, check if the CLI is available by typing
readstore -hTo upload your FASTQ files, use this command
readstore upload my_file_read1.fastq my_file_read2.fastqNote: You can use wildcards (*) to upload multiple files at once. Ensure your files have valid extensions like .fastq.gz. You can view valid extensions with readstore configure list. Filenames don’t need to be unique; you can rename them later in the staging area.
2. FASTQ Staging and Creating Datasets
Once uploaded, FASTQ files can be grouped into Datasets to keep related files (like paired-end reads) together, making management easier.
Automatically Grouped Files
ReadStore will attempt to group files based on their names. For example, files named my_experiment_r1.fastq and my_experiment_r2.fastq will be grouped into a dataset called my_experiment. You can adjust the dataset name during check-in if needed (since dataset names must be unique).
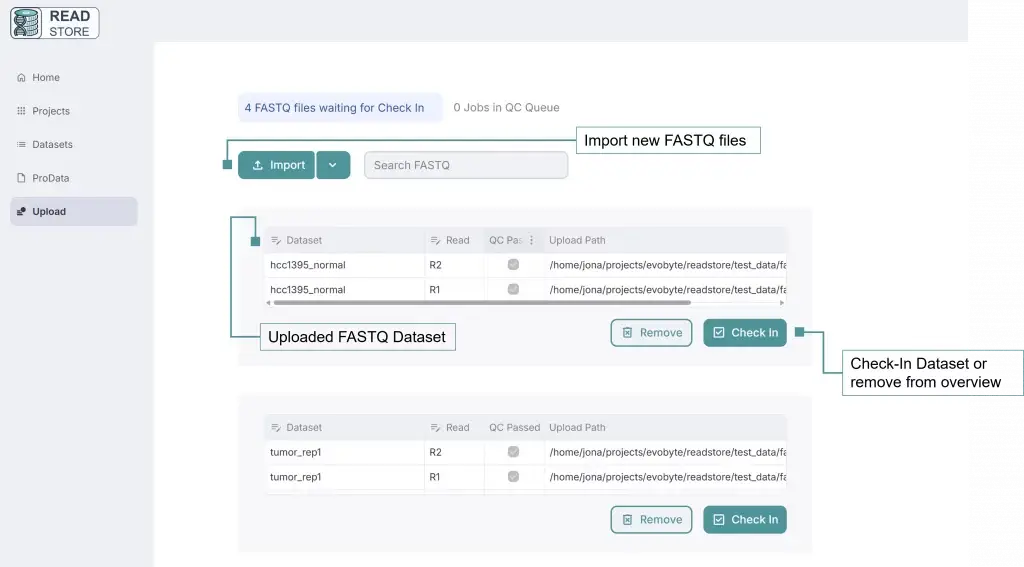
Check In Process
In the upload area, you’ll see your uploaded FASTQ files. Click Check In to proceed:
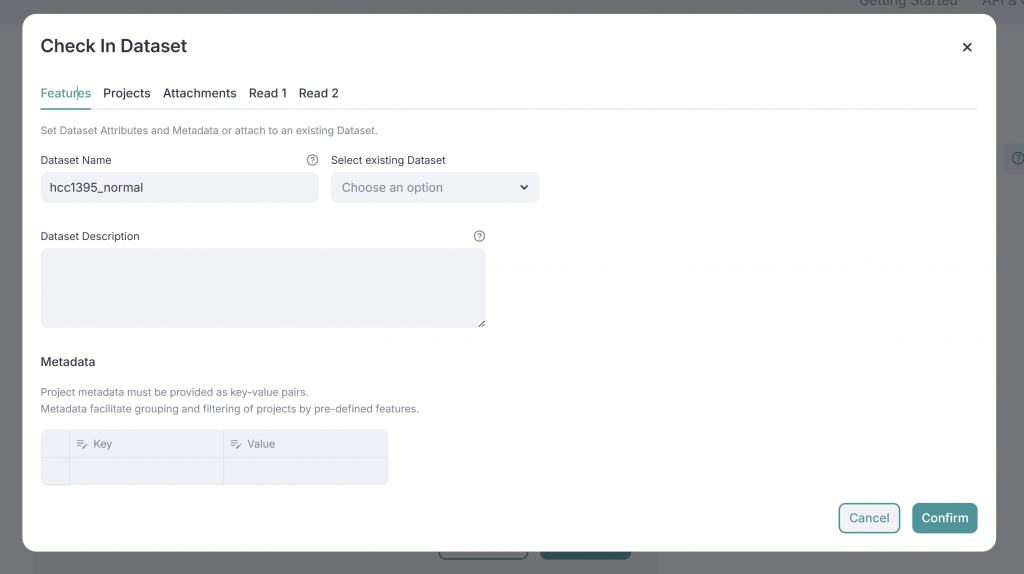
- Features Tab: Change dataset names or attach to an existing dataset. Add metadata, which are structured key-value pairs (e.g., replicate: 1, exp_id: ABC). This metadata is important for future data analysis.
- Projects Tab: Assign the dataset to one or more projects for easier organization. Metadata from these projects is inherited by the dataset.
- Read Tabs: Review statistics and quality data for each FASTQ file in the dataset.
If everything looks good, click Confirm to finalize the dataset. It will then appear in the Datasets page for analysis.
Manual Dataset Grouping
In some cases, ReadStore might not group your FASTQ files correctly during the automatic process, especially if you have multiple files with similar or identical names. For example, if several files from different experiments share the same name (e.g., test_r1.fastq), ReadStore may mistakenly group all of them into a single dataset. This could lead to a dataset with too many FASTQ files attached, making it harder to manage and analyze your data.
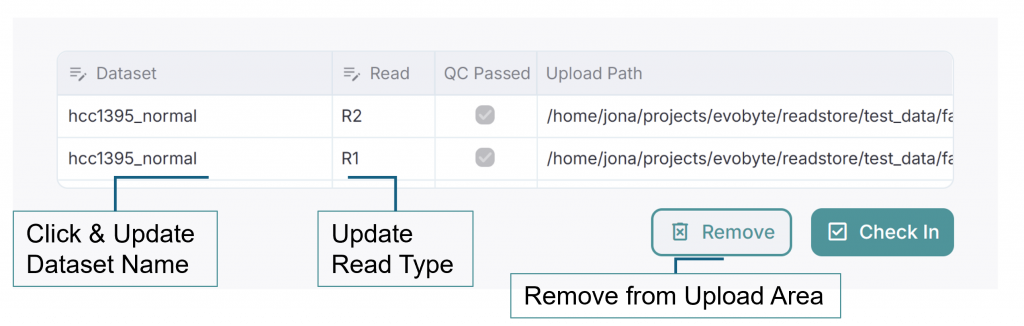
To resolve this, you can manually adjust the dataset name and regroup the files. In the Staging Page, you will see all your uploaded files listed. By changing the dataset name for specific files, you can split them into separate datasets.
Once you change the name of a dataset, the affected files will automatically be re-grouped into the new dataset. You can then proceed with the Check In process as usual, ensuring that each dataset is correctly set up for further analysis.
Read Type Issues
Additionally, there might be situations where the read type (such as “read1” or “read2”) is not recognized automatically, especially if your file naming convention doesn’t follow standard patterns. In such cases, you can manually assign the correct read type by selecting it from the Read Type dropdown menu in the Staging Overview. This ensures that ReadStore correctly interprets the role of each FASTQ file within a dataset, which is critical for downstream analysis.