
Quick Guide to Installing and Setting Up ReadStore Basic
If you’re managing Next-Generation Sequencing (NGS) datasets, you know the importance of having a robust system to store, organize, and access your data efficiently. ReadStore is an open-source solution designed to help researchers and labs manage NGS datasets. This post will guide you through setting up ReadStore Basic on a Linux environment and connecting it to its WebApp interface in just a few steps.
1. Installing and Running the ReadStore Basic Server
The ReadStore server stores and manages your NGS datasets, and the web application lets you access the data from your browser.
Requirements
Make sure you have Python 3.12 or higher installed.
Step-by-Step Installation
1. Create a Virtual Environment To isolate ReadStore and manage dependencies easily, create a virtual environment (you can also use Conda if preferred). This step is not mandatory but generally a good idea.
python3 -m venv venv
source venv/bin/activate
2. Install ReadStore Basic Server: Use pip to install the server:
pip3 install readstore-basic3. Validate Installation: Ensure the installation was successful:
readstore-server -v4. Start the Server: Move to the directory containing where you want to create the ReadStore Server database, then start the server:
readstore-serverIf you want to enable a login screen and user management, start enable login. In this case you must set an admin password on the first start.
readstore-server --enable-login --admin-password <pwd>To keep the server running in the background, you can configure it as a Linux systemd service. Check the official README for details.
2. Accessing the ReadStore WebApp
With the server running, access the web app from your browser by navigating to 127.0.0.1:8501. This address works for local setups; however, if you’re running ReadStore on a remote server, you’ll need to set up an SSH tunnel.
Connecting Remotely via SSH Tunnel
On Linux, you can create an SSH tunnel using:
ssh -i path/to/sshkey.pem -L 8501:127.0.0.1:8501 username@hostIf you’re on Windows, use PuTTY to set up the SSH tunnel. Follow this PuTTY tutorial to configure your connection.

3. [If login is enabled] Create your first user account
Once you enter the webapp, log in with username “admin” and the set password.
- Change the Admin Password: Move to the Settings page and update the default password for better security. This ensures that passwords are not accidentally logged.
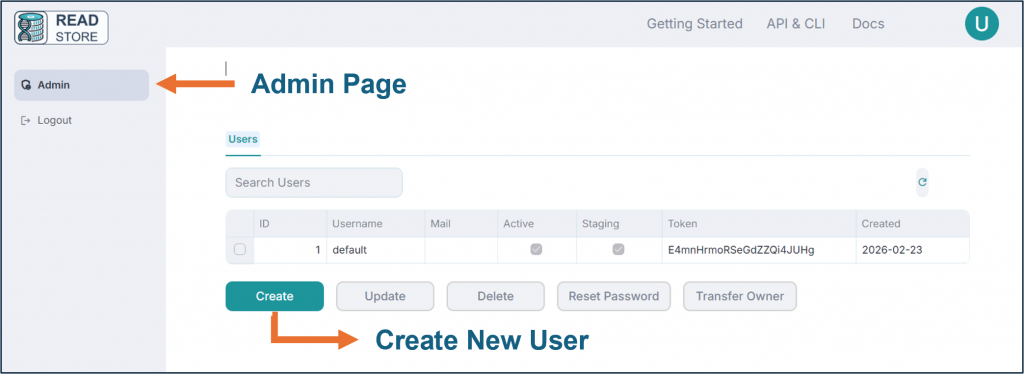
- Create New Users: Move to the Admin page, create user accounts and grant staging permissions to enable file uploads.
- Login with User Account: Login with the newly created user credentials.
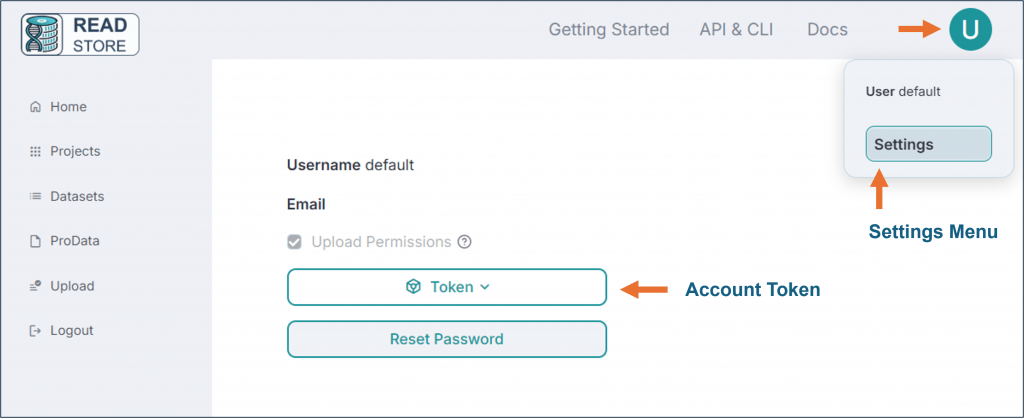
Once your user accounts are set up, login and move to the Settings page. Here you can get your user token which you need to configure the ReadStore command line interface (CLI).
5. Setting Up the ReadStore CLI
The CLI simplifies interactions with the server, including uploading files. Here’s how to set it up.
0. Account token
Obtain your readstore token: You can get access to your token via the settings page of your app, in the top right menu.
1. Install the CLI
pip install readstore-cli2. Validate Installation
readstore -v3. Configure CLI Credentials
readstore configureEnter your username, token, and select a default output format for queries. The output format defines how queries are returned, and can be set according to your downstream applications.
6. Uploading Your First FASTQ Files
Once your CLI is configured, uploading files is straightforward. Navigate to the folder containing your FASTQ files and run:
readstore upload *.fastqLog into the ReadStore WebApp, navigate to the Staging page, and confirm your files have uploaded successfully.
Congratulations on Setting Up ReadStore!
In just a few steps, you’ve set up a powerful tool to manage your NGS datasets. With the ReadStore Basic server running, you can securely upload, manage, and access your data, all from an intuitive web interface. Happy sequencing!